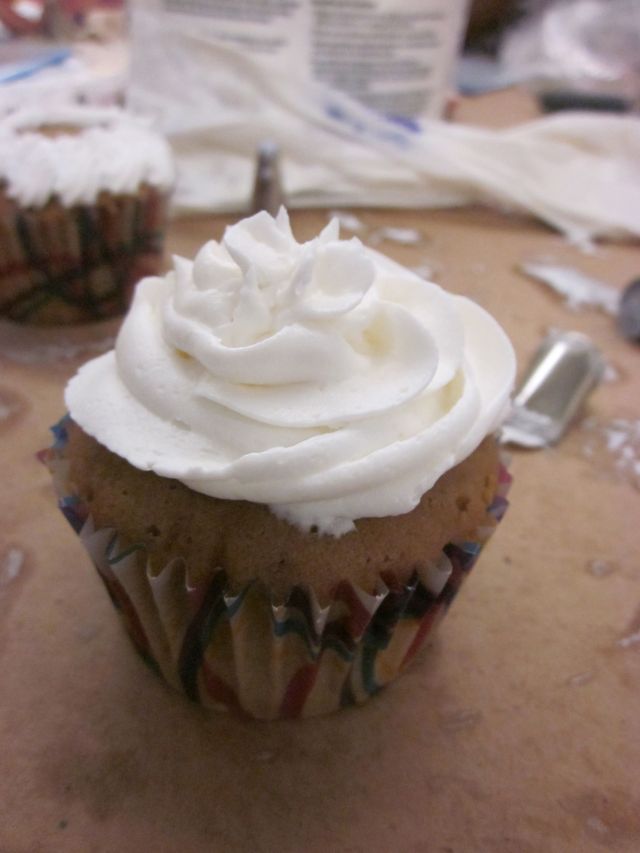
Super Un-Official Hiatus is Now Over + Pumpkin Whoopie Pies

Hey there cyber world, look who is back in action!!!!!!! So I know that I probably have a lot of explaining to do but fear not, all your questions will be answered in a nice, orderly fashion.

  • Where the hell have you been? I’ve been in Brighton, a part of Boston, transitioning from being a lazy college graduate to an over-stressed grad student. Turns out this transition has been a bit trickier than anticipated. I went from having tons of free time to having barely any. Blogging takes some time, not a lot or anything, but it takes some. Between classes, homework, my internship, nannying, and just getting by, its been hard to find some time time. Basically, what I need to start doing is setting aside some time once a week for blogging.
  • Have you been baking? um, this week I did. Basically, this excuse applies to the first one. Time is a big part of baking and finding a good two hours or so to just focus on baking has been tricky but hey, I’m trying to make it work. Especially now that I have some extra money from job. Believe it or not, but I can actually afford to buy ingredients again! YAY! I might not be able to bake or cook something once a week, but I’m gonna aim for once every two weeks.
  • How are classes? Why thank you for asking. Classes have been good. Been learning a lot about the world of library and information professionals such as cataloging, metadata, library history, and the ins and outs of archiving. For the most part, things have been easy, but the assignments for my information organization class (cataloging etc) have been mega time killers. Thank god my classmates are super nice and are open to working together on assignments. You know the saying, strength in numbers.
  • How is Boston? fantastic! I love living here; there is always stuff to do which is a big change when compared to last city I lived in *cough* worcester *cough*. For the first time, I’m not restricted by not having a car. In Boston, you can go almost anywhere with the T or by foot. And since I’m such a big fan of walking, I have really gotten the chance to do some urban exploring. This how I discovered that I live right near a giant reservoir, one that is perfect for runners. I’ve gone jogging there a few times and I really enjoy being around other runners again
  • What else is new? well, a group of friends from home and I have decided to start to book club that we call “The Throw back Book Club”. It’s all for fun but what’s cool is that we are reading books from our childhood. This month we’re reading Harry Potter and the Sorcerer’s Stone. Remember that one? So far its been great re-reading it, each chapter brings back memories of the first time I read it. What else???? I’m interning at a historical commission for the city of Cambridge which is turning out to be super cool. I basically get to handle old documents, photographs and other things as I sort through them to form a collection. Oh, and I went to Harpoon Brewery’s Octoberfest. That was freak’n awesome!
  • What about those whoopie pies? see recipe below.
Whoopie pie success!

Whoopie pie success!

Pumpkin Whoopie Pies

Recipe adapted from created by The Baker Chick 

Ingredients for the cookies

  • 3 cups all-purpose flour
  • 1 tsp. salt
  • 1 tsp. baking soda
  • 1 tsp. baking powder
  • 2 tbsp. cinnamon
  • 1 tsp. ground ginger
  • ½ tsp. ground nutmeg
  • 1 cup granulated sugar
  • 1 cup dark brown sugar, firmly packed
  • 1 cup canola oil
  • 1 15 oz can of pumpkin puree
  • 2 large eggs
  • 1 tsp. vanilla extract
  • For the Filling
    • 3-4 cups powdered sugar
    • ½ cup unsalted butter, at room temperature
    • 8 oz. cream cheese, at room

In a medium bowl, whisk together flour, salt, baking soda, baking powder, cinnamon, ginger, and nutmeg.

In another bowl, whisk sugars and oil together. Add the pumpkin puree and combine thoroughly Add the eggs and vanilla and mix until combined. Slowly mix both mixtures until just combined.

With a small ice cream scoop, form a tablespoon of dough and place on baking sheet about 1 inch apart. Bake for 10-12 minutes, until the cookies are just starting to crack on top and an inserted tooth pick comes out clean. Remove from the oven and let cool for 5-10 minutes. Transfer to wire rack to cool and repeat with remaining dough

For the Filling With an electric mixture, beat the butter and cream cheese in a bowl until smooth. Add the powdered sugar, vanilla and beat until smooth. If you want to a firmer filling, add more powdered sugar.

To assemble, either pipe or use a knife to spread the filling on the flat side of one of the cookies before topping it with another cookie. Press down slightly so the filling spread. Repeat until all cookies are completed. Refrigerate for about a half an hour before serving.

Behind the Curtain Dessert Challenge: Apples and Cinnamon + a Little Honey

Shana Tova everyone! Or in English, Happy New Year. Now I know what you are thinking ‘she’s lost her mind’ but trust me, I haven’t. You see, last week was the Jewish holiday of Rosh Hashannah, or the Jewish new year. However we aren’t just wishing our peers a happy new year, we are wishing for a sweet new year. Why sweet? Well why not? Ok, I’ll admit, I don’t entirely know why we wish specifically for a sweet new year but hey, why spoil a good thing? And you want to know what’s a good thing? Dipping freshly cut apples into gooey, warm honey. Sure Jews don’t get to have the twelve days of Christmas but who needs that when you have apples and honey. Shana Tova indeed!

IMG_20130906_142332_20130911205259625

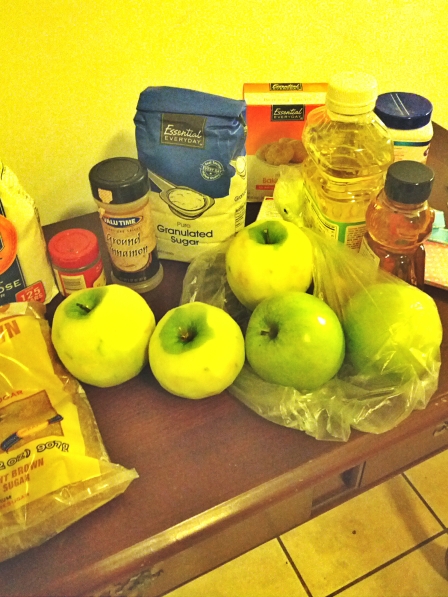
Now normally I spend Rosh Hashannah at home or with friends but since I just moved to Boston, heading home wasn’t exactly an opinion for me. However I decided that even if I couldn’t enjoy the holiday with my friends or family, that didn’t mean I had to miss out on all the fun. So, I did what I do best. I baked. Combing the best of both worlds, I made a deliciously festive apple honey cake. But wait, it get’s better! Just as I was prepping for the baking process, Sheryl from Behind the Curtain Baking Challenge posted the flavor theme for the month of September. Apples and Cinnamon. How perfect was that? So behold dear readers, my apple cinnamon + honey cake. I also want to point out that this is the first thing I have baked in my new apartment.

Two sides notes:

1). I didn’t make the icing due to not having the ingredients/ not having it in my budget to pay for powder sugar. Now that I have a job (yay) I hopefully can buy powder sugar soon

2). Please pardon the pictures; without a window and limited lighting, the images have come out a bit dark.


IMG_20130906_164832_20130911205508778

Apple Cinnamon + Honey Cake

Adapted from a recipe found here

Ingredients

  • 3 eggs
  • 3/4 cup honey
  • 1/2 cup white sugar
  • 1/4 cup light brown sugar
  • 1 1/4 cup canola oil
  • 1 1/2 tsp vanilla
  • 3 cups all purpose baking flour
  • 1 tsp baking powder
  • 1 tsp baking soda
  • 2 tsp cinnamon (could also be 1 1/2 tsp depending on taste preference)
  • 3/4 tsp salt
  • 1/4 tsp allspice
  • Dash of ground cloves
  • 3 Granny Smith apples – peeled, cored, and shredded

Preheat oven to 325 degrees F. In a large mixing bowl, beat the eggs until they are frothy. Whisk in the honey, white sugar, brown sugar, oil and vanilla. In a separate medium mixing bowl, sift together the flour, baking powder, baking soda, cinnamon, salt, and spices. Incorporate the flour mixture into the liquid, stir to blend. Fold in the shredded apples.

Spray your 9 inch Bundt pan with cooking spray, making sure to evenly coat the entire inner surface. Pour your batter into the pan. Bundt pan depths vary, so make sure the batter fills the pan ¾ full or less. Do not fill beyond ¾ or your cake might overflow during baking. Use a spatula to gently push the batter to the outside of the pan, pushing slightly up the walls. This will help to get rid of any air pockets that might interfere with the pretty details of the pan. Smooth the batter on the top so it is flat and even all the way around the pan.

Bake cake in preheated oven for 75-90 minutes. When the edges darken and pull fully away from the sides of the pan, and the cake browns all the way across the surface, insert a toothpick deep into the thickest part of the cake. If it comes out clean, it’s done. It’s a very moist cake, so it’s easy to undercook it– err on the side of caution and let it bake a little longer if you’re unsure (but don’t bake it too long or it will dry out!).

Let the cake cool for exactly 10 minutes, then invert it onto a flat plate. Tap the Bundt pan gently to release the cake. If your cake sticks, use a plastic knife to carefully loosen the cake around the center tube and sides. Allow cake to cool completely. Serves about 10

Powered by Linky Tools

Click here to enter your link and view this Linky Tools list…

Blueberry and Nectarine Buckle

I have noticed something in the last few weeks, perhaps you have to. It seems that I have unintentionally become the queen of the crisps and cobblers. I’m not totally sure how this happened; I don’t recall pulling a sword out of a stone nor do I remember a long lost grandmother inviting me over to her mansion for tea before dropping the royal bomb.

    My exact reaction if my grandmother WAS either a queen or Julie Andrews

My exact reaction if my grandmother WAS either a queen or Julie Andrews

Seriously, when I was baking this dessert I found myself thinking, “Gee, I have been making a lot of stuff with crumb toppings lately.” One look at my blog later and I realized that throughout this summer I have made a crisp, a streusel, ‘pie bars’ which are essentially a kind of cobbler, and now, I am adding a buckle to the mix. See what I mean about being queen of the crisps and cobblers? As much as I do enjoy being the queen of something, I think I will be handing in my crown soon. All of these recipes have been super delicious but I think after this one, I’m gonna try and do something a little different. I will add the the combination of blueberries and nectarines makes for an absolutely mouth watering summer dessert. While nectarine season may be ending, give this dessert a shot next summer; your family will thank you for it.

Prep bowls for the win!!!

Prep bowls for the win!!!

By the way, if you are like me and have no idea what the difference is between a buckle and a crisp, let me enlighten you.

A buckle: These desserts are a single layer, have fruit in the middle, and feature a streusel like topping, which gives the dessert its buckled  appearance

A crisp: Baked with fruit (duh) and have a crumb topping. Similar to a buckle, neither dessert has a bottom.

A cobbler: A deep-dish dessert with a fruit filling and a thick topping.

A brown betty or betty: Usually made with apples but other fruit can be used as well. Unlike the other three, this dessert is layered, with the fruit sandwiched between a crumb crust and topping. *Given this information, I think my strawberry-rhubarb dessert is technically a betty not a crisp*

Blueberry and Nectarine Buckle

From The Sono Baking company Cookbook Serves 8 to 10

Streusel Topping
1 cup all purpose flour
1 cup light brown sugar
1 teaspoon coarse salt
1/2 teaspoon ground cinnamon
1/2 cup (1 stick) cold, unsalted butter, cub into small cubes

1 1/4 cups all purpose flour
2 teaspoons baking powder
1 cup (2 sticks) unsalted butter, at room temperature
1 cup granulated sugar
1/2 teaspoon coarse salt
4 large eggs
2 teaspoons purse vanilla extract
2 cups blueberries’2 cups diced (!/2-inch) nectarines (about 2 nectarines)
Confectioners’ sugar

1. To make the streusel: In a medium bowl, use a fork to stir together the flour, brown sugar, salt, and cinnamon. Add the butter, and using your fingertips, quickly work it into the dry ingredients until pea size crumbs formal set aside in the fridge

2. In a medium bowl, whisk together the flour and baking powder; set aside

3. Set the oven rack in middle position. Preheat the oven to 350F. Butter a 9 by 12 inch baking dish; set aside. Pull a baking sheet to set the dish on while baking

4. In the bowl of a standing mister fitted with the paddle attachment, beat the butter, sugar and salt on medium-high speed until light and fluffy, 2 to 3 minutes. Beat in the eggs one at a time, and then the vanilla. On low speed, beat in the dry ingredients just until absorbed. Fold in the fruit. Transfer to the prepared baking dish. Sprinkle the streusel over the top

5. Set the baking dish on the prepared baking sheet. Bake, rotating the sheet about two thirds of the way through the cooking time, until a cake tester interred into the thickest part of the buckle comes out clean and the topping is nicely browned and crisp, 30 to 35 minutes. Transfer to a wire rack to cool for 10 minutes. Dust with confectioners’ sugar and cut into squares.

I ended up using margarine for some of my butter so mine may be a bit more buttery than it should be

I ended up using margarine for some of my butter so mine may be a bit more buttery than it should be

Foodie Ramblings: Beating Egg Whites

Dear Readers,

As I discussed in last night’s post, understanding how to properly beat egg whites might be the thing that will be the difference from a baking success and a baking fail. If you are the type who has mastered the art of beating eggs into stiff and thick perfection, than kudos to you (super jealous BTW).But if you are like me and still struggling to figure it out, we are still at the point were some instruction is require. While there are a plethora of informative guides out there to help explain this process, the recipe I was using was not one of them.

Still a wee bit bitter about how things turned out, I decided to do some research about beating egg whites to figure out where things went wrong. Looking back on it now, I probably should have done this yesterday before I started baking but hey, live and learn right?

*Please note, I am not a science person by any stretch of the imagination, unless its forensics (WHOOT!). I have done my best to explain the more scientific stuff behind beating egg whites in a manner that someone like me (an idiot) would understand. I apologize to any science inclined people who may read what follows. Proceed with expectations set to low*

Fun fact first: Egg whites that are whipped with sugar are also referred to as meringues, so says How Baking Works by Paula Figoni. According to Ms. Figoni, meringue can not form without the combination of proteins that are found in egg whites. As the egg whites are whipped, air bubbles are beaten into the liquid and certain egg proteins unfold, creating a structure that traps and protects the air bubbles are breaking down.  Over time, the egg whites transform the from foam into a more stable mixture.

Clearly then, stability is key. Stable meringues should be firm but also flexible since it needs to withstand being folded and baked. At the same time, they should also have volume and lightness. Unfortunately, there are quite a few things that can affect that.

1. Sugar: This is basically the ingredient that stabilizes one’s whipped egg mixture. In the case of making something like a meringue, the sugar needs to be added slowly since the sugar crystals need a chance to dissolve within the egg white foam. If added too quickly, the proteins may not be able to unfold, which either leads to a softer meringue or whites that won’t whip at all.

2. Fats or lipids: These can mess up with the process of aeration either by slowing it down or preventing it from happening all together. Have you ever been cautioned about making sure no yolk gets mixed into your egg whites? This is why. Lipids interfere with the infolding of the egg proteins which affects the trapping of the air bubbles. If the air bubbles are contained properly, they will collapse.

3. Acids: Acids lower the pH of the meringue. Cream of tartar is the most common of acids used in whipping egg whites. This is an ingredient that should added early, as it will allow for the creation of a structure that will be flexible and stable.

4. Temperature: Egg whites should be room temperature, not chilled. Those right out of the fridge won’t whip well. Take them out in advance.

5. Whipping Time: If whipped too quickly or for too long, the meringue structure will begin to collapse and curdle.

6. Copper: Whipping in a copper bowl will increase a meringue’s stability similar to the way cream of tartar does; improves the flexibility and helps prevent over-whipping.

Ok, so the above are what can make or break one’s hopes of producing a perfect meringue. So what about the actual process? Well, the most basic and informative that I came across comes straight from my copy of Baking Illustrated. This is what they suggest.

1.Beat the egg whites and medium-low speed until froth, about 30 seconds. Raise the speed and add the cream of tartar to help stabilize the egg foam. Slowly add the sugar and continue to beat.

2. Just before the whites reach the proper consistency, turn off the mixer. Detach the whisk attachment and remove the bowl from the mixer. By hand, use the whisk attachment and give the mixture a few more strokes.

Soft peaks will droop slightly downward from the tip of the whisk; stiff peaks will stand tall.

So there you have it, an abbreviated explanation behind the science of beating egg whites, sort of. Hopefully, this information helps you as it will certainly help me in the future.

Till next time!

List of Sources

“Common Baking Problems and How to Avoid Them.” Baking Illustrated: A Best Recipe Classic. Ed. The Editors of Cook’s Illustrated Magazine. Brookline, MA: America’s Test Kitchen, 2004. 135-50. Print.

Figoni, Paula. “Eggs and Egg Products.” How Baking Works: Exploring the Fundamentals of Baking Science. Third ed. Hoboken, NJ: John Wiley & Sons, 2011. N. pag. Print.

Foodie Ramblings: Chiffon Cake Rant

The sensation of failure is not something that many actively seek out. While I am not completely pleased to admit this, tonight, I experienced another baking fail. This time around, it was a chiffon cake.  An olive-oil lemon chiffon cake if you want to be specific. For those of you out there who are scratching their heads and wondering aloud, “What is a chiffon cake?” here is a brief rundown.

Invented in the early part of the twentieth century, the chiffon cake is traditionally made with either vegetable oil or, in my case, olive oil. Unlike its well known cake cousin, the angel food cake, a recipe for a chiffon cake calls for both egg whites and egg yolks. While the egg yolks are mixed in with your flour mixture, the egg whites are whipped into a frenzy until they are stiff and thick. This creates the airiness that distinguishes a chiffon cake from the other cakes in the club. Seems pretty straight forward right? That is, unless you are using a recipe that isn’t coming out of a cookbook like Baking Illustrated, where the authors comfortably hold your hand as they lead you through the world of baking. In cookbooks like BI, they authors aren’t trying to be fancy or pretentious; they want the people who purchased their book to feel comfortable in the kitchen, especially when they are trying something new.

This was not the case for the recipe that I used. Instead of trying to be humble and informative, this recipe decided to be hip and trendy by promoting itself as a “skinny” recipe, only 260 calories per serving. Oh boy!!!! While I am all for eating healthy and what not, sometimes recipes are the way they are for a reason. In the case of this cake, the recipe didn’t ask for stiff and thick peaks, rather, it asked for peaks that were “just about stiff”. What the hell does that mean? As I have already explained, baking with egg whites has never really been my specialty. While I now know how the process goes in regards to beating egg whites until they are stiff and thick, I have never done it myself. Even so, I can figure something like that out by keeping an eye on the egg whites. When they’re thick and stiff, it’s somewhat hard to not notice. But what about egg whites that are just about stiff? How does one figure that out? I certainly didn’t know the answer and the recipe clearly wasn’t going to tell me either. So I did what I thought was best, I put total faith in the recipe and went with my gut. Talk about a great idea!

tumblr_m2nih8I3le1qa86mcWith my eggs sort of but not really stiff, and combined with all the other ingredients, it was time to put it in the oven. Ok, that shouldn’t be too hard. Right? Wrong! Having a tube pan that leaks batter sure complicates things. Thank god that I had my trusty bundt pan on hand. Clearly, tonight was not my night for baking. So how did this more trouble then it’s worth cake come out? Eh. Not amazing, but not totally horrible either. The flavor was great, the structure, not so much. This was 100% due to the egg white thing. However, I can’t totally blame the recipe for what happened. I’ll be honest, I probably didn’t beat the eggs enough. True, I didn’t know what I was doing, but still, they should have been thicker. Still, this doesn’t excuse the recipe. It was far too vague regarding what the egg whites should have looked like and that def did not help me out.

So all in all, what did I learn tonight?

1. When making a chiffon cake, make sure you have egg whites that are stiff and thick, even if the recipe is too pretentious to admit it.

2. Check your tube pan before using it. Even if it seems ok, set it on top of a cookie sheet lined with parchment paper before baking. Just to be on the safe side.

3. Approach recipes that are coming from a questionable source with caution. While there is nothing wrong with trying a recipe out of magazines like Taste of Home and Bon Appétit, keep in mind, those magazines are written by people who know food. I pulled this recipe out of fitness magazine and that should have been red flag at the start.

4. Getting lemon juice in your eye hurts like hell.

Till next time.

The Foodie Goes to Market

I am somewhat ashamed to admit this but until this past Sunday, I had never had the pleasure of visiting a farmer’s market. True, I have been to the Shuk in Jerusalem, which is a partially opened market where vendors of all sorts gather, but I didn’t really appreciate the experience when it occurred. Probably because I was an idiot and wore open toed shoes when I visited. Note to anyone who is thinking about planning a trip to the Shuk in Israel: DON’T WEAR FLIP FLOPS OR SANDALS!!!! Your toes will be crushed by carts or stomped on by pedestrians determined to get that last cabbage head.

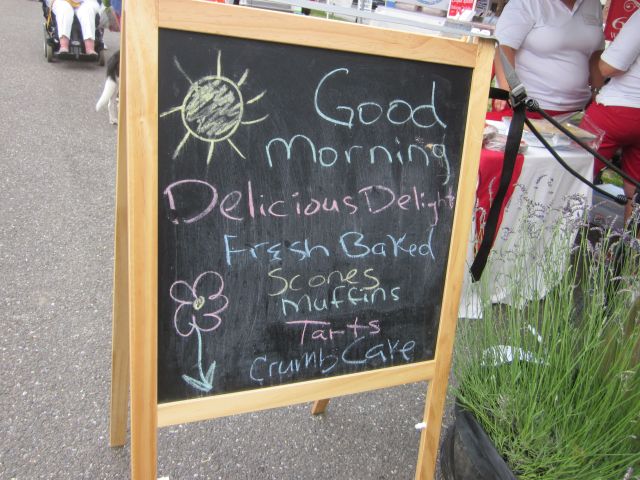
IMG_4181Thankfully, the farmers market that I attended was far less competitive and overwhelming. While it certainly wasn’t the biggest farmer’s markets out there, the size was just right for a first timer for me. For one thing, I didn’t feel rushed and intimidated as I took a quick stroll around. All around were people from the area, curious just like me to see what the vendors were selling. Although it was early on Sunday morning, the place was plenty crowded; some vendors were already sold out of some of their products. After one stroll around, I knew I was in love. After being surrounded by all the fresh produce, herbs, cheeses, and baked goods, I have decided that attending farmer’s markets should become my new hobby. IMG_4178Truly, I wish my eyes had been opened to how awesome these things are years ago! From a foodie’s standpoint, I couldn’t help but daydream about the different dishes I could make with all the different produce on sale. True, it was a bit more expensive than what you might find at a grocery store, but the quality more than makes up for it. Additionally, I stumbled upon some ingredients that I have never seen in stores. Like lavender. This is an ingredient that I have always wanted to get my hands on; what can I say, the idea of lavender cupcakes sounds too good to not try. However, I have always wanted to buy it IMG_4182fresh rather than through amazon.com. And finally, after two years of yearning, there it was, right in front of me!!!!! Dreams really do come true!

Unfortunately, I didn’t have enough money on me to buy it but I wasn’t too upset. This particular farmer’s market will be happening every Sunday in town for the remainder of the summer. I can promise you that I’ll be going back this coming weekend.

If any of you live in the Boston area and know of any local farmer’s markets, let me know. I’ll be moving there in September and would love to check them out.

Cake Fail: Hey, it Happens

Sometimes we forget that we were all novices at one point in our lives.

As the great Julia Child once said:

No one is born a great cook, one learns by doing.” –My Life in France (2007)

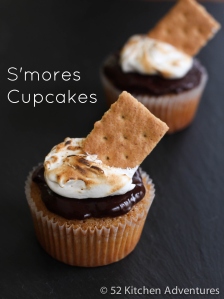
In the last two years, I have been highly fortunate to have unusually long run of baking successes. Of course there has been some failures, the majority of them related to appearances rather than taste. But don’t get me wrong, I have experienced some considerably nasty baking failures. Personally, I think my most memorable failure just so happens to be my first. It was junior year of college, a little more than two years ago. I had only begun seriously baking, having started the summer before. Until that early spring afternoon, I had never known the sensation of failure, at least in a baking context. That was until I decided to take my baking up a notch and try something new. The recipe? S’mores cupcakes. Chocolate cupcakes with a gram-cracker bottom topped with a homemade marshmallow. While the cupcake itself was relatively easy to make, the marshmallow was another story entirely. Going into it, there were three signs that failure was going to be imminent.

http://www.52kitchenadventures.com/2013/05/23/homemade-smores-cupcakes/

From 52 Kitchen Adventures. I later tried this recipe and it worked perfectly.

1. I didn’t understand how egg whites worked. The whole notion not getting any yolk in the whites was beyond my comprehension.

2. I lacked an small, candy, thermometer. The recipe asked me to heat the eggs to a certain temperature before removing them from the heat. A slightly hard things to do without a thermometer.

3. I didn’t know the difference between over beating and under beating. Even if I had managed to get this far along, I lacked the knowledge to distinguish a difference.

Putting all three things together, it would be safe to say that I was doomed from the start. What resulted was a minor breakdown. Ok, maybe a bit more than minor. But after the tears were done, I was able to step back and take note of where I had gone wrong. I learned something that day: never bite off more than you can chew, especially if you don’t totally understand the task you are about to undertake. It was a lesson that I have since taken to heart.

Its been more than two years since that dark day in my personal baking history and once again, failure has come knocking on my oven door. This time around, I wasn’t trying to make something challenging. It was to be a simple birthday cake for dad, who turned 61 this past Sunday. While the s’mores cupcake fiasco was caused mostly due to ignorance, this time around, it was due to a faulty cake pan and our oven.

Taken from one of my mother’s beloved Cusinart cookbooks, she assured me that this was something that couldn’t go wrong. Well, it did. And boy oh boy was I surprised when the thing crumbled apart. Initially, we thought it was because we only put in 1/3 cup of brewed coffee instead of 1 cup, leaving the batter too dry.

Hard to believe that a minor difference could affect the final result.

Hard to believe that a minor difference could affect the final result.

An hour later, we shifted blame to the cake pan it was baked it. “I guess that’s what you get when you buy a cheap pan at the store.” Now my mom mentions that. But it was true, something was wrong with it. After I coated the pan with butter, which I did generously, and later flour, not enough of it seemed to stick. We later compared this to a pan I bought of amazon.com and it was true; her pan seemed unable to be coated correctly.

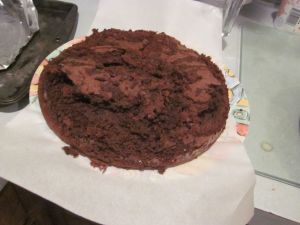
As for our oven, its quite possibly the slowest oven ever. It takes forever to reach the designated heat and then as soon as you open the door to turn the pan, it has to reheat to get back. When the timer went off and I went to check to see if it was done, my tooth pick came out with moist batter on it. I shut the door and added another five. Second time around, it came out clean. Ten minutes later I went to separate and this was what I got.

Happy Birthday daddy!

Happy Birthday daddy!

Half the cake came out, and the rest stayed in the pan. Not good at all. How about the taste? After all isnt’s what matter’s? Dry. Very dry. Was it the lack of coffee? The recipe also called for sour cream so the batter was plenty wet. Was it the oven? Who really knows? Despite the inopportune timing of this cake fail (9:30pm) it was kind of nice to be reminded of what I learned two years ago. Never underestimate a recipe, ever! Even if it seems simple, read the directions carefully and be prepared for all sorts of outcomes.

Since I started today’s entry with an inspiring quote from one of my personal idols, I think its fitting to end with another quote, one that I think perfectly fits with this post’s theme.

Take chances, make mistakes, and get messy” -Miss. Frizzle.

I think that applies to cooking and baking quite nicely.

Till next time,

Litbaker

Recipe Write Up: Coffee Cupcakes

Recall how last week I mentioned that I was taking a cake decorating class. Well, for my most recent class, we were instructed to bring in six cupcakes so we could decorate them. They either could be baked or purchased at a supermarket so long as they were regular size, flavor certainly didn’t really matter. Considering how well received my cake from a previous class was, I was understandably hesitant to tell my parents. By the way, Mr. Cake has officially be evicted from our fridge and now resides at the top of some trash heap. Remarkably, my mom took the news well. But then, she threw me a curve ball. Instead of buying my cupcakes, she insisted I bake mine from scratch. “After all”, she said nonchalantly, “cupcakes are your specialty.” Just a few days before she was lamenting about the limited space in our fridge and the fact that neither she or my dad really eat baked goods. Yet, here she is challenging me to make something she knows I can’t resist. Talk about mixed signals

She isn’t wrong though, cupcakes are indeed my favorite thing to make. They can be simplistic or complex. Truly, with a cupcake, the possibilities are relatively endless. And, as always, every time an occasion arises that calls for cupcakes, I always strive to make something new, to challenge my baking skills. After going through a few of the food blogs that I read religiously occasionally, I finally settled on one. Coffee flavored cupcakes with a beautiful vanilla butter cream frosting. Combined together, the taste would be something reminiscent of a vanilla latte. Unfortunately, I wouldn’t be getting the full latte effect. Confession time: I leave out the frosting when I bake cupcakes at home. Why? Well, let’s just call it the parent factor. As I learned years ago, none of my parents really like frosting and when frosted, you are basically giving your cupcakes an expiration date. Freezing them really isn’t an option. Trust me, if it wasn’t for the parent factor, I’d be making frosting whenever I could. However, even without the vanilla butter cream, these cupcakes tasted fine, especially when eaten while drinking my favorite tea, vanilla chai. PicsArt_1371485867733

Then again, I never doubted the taste; I kind of helped myself to the batter left in the bowl. Ok, I helped my self to a  lot of the batter that was left in the bowl. Since I don’t actually drink any kind of caffeinated beverages (with the exception of the occasional mocha and latte), I am, according to my dad, constantly caffeine deficient. Since the batter has both espresso powder and brewed coffee in it, my normally yawning and exhaustive self suddenly was moving like the Energizer Bunny.

Oh, and ironies of ironies. We never got to the actual decorating part in my cake decorating class. We ran out of time. At the end of the two hour class, all I had to show for my hard work was one frosted cupcake out of the six I brought. In all honesty, I think it’s better this way. I know my mom wouldn’t have been happy if I had brought back six fully decorated cupcakes. It doesn’t matter anyway. Next week is my final class and I HAVE to either fully decorate a cake or cupcakes. Let’s see how my mom tries to get around this one.

IMG_4144

Coffee Cupcakes

Adapted from a recipe found on annies-eats.com

Makes about 18 cupcakes

¾ cup (1½ sticks) unsalted butter, at room temperature
1½ cups sugar
3 large eggs
2 cups all-purpose flour
1 tsp. baking powder
¼ tsp. salt
1 tbsp. espresso powder
½ cup strong brewed coffee
¼ cup buttermilk
2 tbsp. additional buttermilk

  1. Preheat the oven to 350˚ F.  Line cupcake pans with paper liners.  In the bowl of an electric mixer, combine the butter and sugar.  Beat on medium-high speed until light and fluffy, about 3 minutes.  Blend in the eggs one at a time, mixing well after each addition.  In a small bowl, combine the flour, baking powder, salt and espresso powder.  Whisk to blend.  In a liquid measuring cup, combine the coffee and buttermilk.  With the mixer on low speed, add in the dry ingredients alternating with the liquids, mixing each addition just until incorporated and beginning and ending with the dry ingredients

    Trying to improve my photo skills!

    I’m making an active effort to improve my photography skills. My day’s of snapping pics my with phone are OVER

  2. Divide the batter between the prepared cupcake liners, filling each about ¾ full.  Bake 18-20 minutes or until a toothpick inserted in the center comes out clean.  Let cool in the pans 5-10 minutes, then transfer to a wire rack and let cool completely.

*Next time I’m going to put chocolate chips in the batter so I can have a mocha cupcake. Mhmmm, I love me a good mocha.

Before I sign off I just want to say that History of Cookbooks will be back soon with another installment! Sorry for the wait, but life has been a bit distracting lately.

Till next time,

Litbaker

Labour of Love

Labour of Love

They should attach a warning label to the sign up sheet that reads “Warning, you will be eating in class, a lot”. I had to resist the temptation of running my fingers through the icing.

Despite being surrounded by all things yummy, the class is going really well. The image above might not be the most beautiful thing on the planet but hey, not bad for a first timer! As for the class itself, its going very well. For just $20, which includes four classes and a decorating kit, you can learn all the basics, like basic pipping flower decorations just to name a few things we’ve been learning. You really do get a lot of bang for your buck. I guess the only downside is the somewhat obnoxious amount of advertising for the Wilton Company. I mean, its kind of borderline brainwashing, especially when our wonderful instructor mentions the 50% off coupons Michael’s has a tendency of offering online. Whenever class is over I always find myself back in the Wilton aisle, wondering what else I need to walk out of the store with. Pipping gel, cake boards, maybe a cake tin in the shape of Mr. Spongebob Squarepants?

Oooh I want me some Spongebob cake!!!!

Oooh I want me some Spongebob cake!!!!

Why not? I’m sure I will have a use for it someday down the road.

Pushing aside the corporate whoring, thee class is a blast! At the moment it’s just me and my friend Leslie which means we can act like idiots as much as want without inspiring looks of bafflement from other classmates.  Sadly our days of carefree craziness are now a thing of the past. As of this week, our class has been combined with a large class on Sundays. Apparently our class of two was a financial money pit. What this means is now, Leslie and I have to actually try and act mature since we will be working with five other people. As if resisting the temptation of munching on our baked goods wasn’t hard enough 😛 Well, actually, maybe it would be better if I didn’t resist the urge to eat what we decorate. That cake pictured above is still sitting in my family’s fridge, absolutely untouched. My parents don’t want to eat it so there it sits. Reflecting back on it now, I should have left the cake at the store for the shop clerks to eat. At least then it wouldn’t be going to waste/taking up space in my small fridge.
On the plus side of things, we’re going to be deocrating cupcakes to look like flowers! What this means is that I get to make cupcakes (my favorite thing on the planet) and that my beloved cake is going to have to find a new home…the trash.

Till next time,

Litbaker

Recipe Write Up: Blueberry Compote Sour Cream Muffins

First of all, and this has nothing to do with the recipe, I just learned this morning that CBS has adapted the Great British Bake Off for American TV!!!!! Yea, the American Baking Competition doesn’t have a title that rolls of the tongue like its British counterpart, but hey, its still has delicious looking baked goods. And no, before you ask, it does not have brief little segments that talk about culinary history and what not. Its a bit disappointing but remember this is American TV so I’m going to take what I can get. Even a writer for NPR.com acknowledge the emergence of the American Baking Competition, seeing it the way I do: as a harmless reality tv with a touch of decadence. Its a straightforward formula that has worked (and not worked) in the past so I’m curious to see if this show will be as successful as its British inspiration.

http://www.npr.org/blogs/monkeysee/2013/05/29/187050032/cbs-debuts-a-baking-competition-as-broadcast-continues-borrowing-from-cable

*I really like how at the bottom she insists that any show with Gordon Ramsey is a Gordon Ramsey show, not a competition show. It’s true though. I don’t care about the contestants (except for Masterchef) I just really want to see Ramsey call someone a donkey*

Alright, I’m done wasting time. On to the main event.

Muffins, like cupcakes, are one of those that I just absolutely love to make. Doesn’t matter what the recipe is, I will gladly throw my apron on and jump into the kitchen if it means I get a chance to bake a batch of these tasty beauties. So I’m going to confess something: I may be a novice cook but when it comes to baking, especially cupcakes and muffins, I’d like to consider myself something of a pro. Does that mean every cupcake or muffin I make is going to come out of the even with a heavenly glow and angelic choir screeching out of them? No, but I can almost guarantee that they will taste good, about 95% of the time. Usually. Given such this decent track record, my mom’s work buddies asked me to bake something yummy for a co-worker who was retiring. While at first I had a million ideas going through my head. I could make cake, cupcakes (both meant I’d get to make icing!!!), bread, tarts (something new for me), or brownies. The possibilities were endless. But then mom threw me the curve ball. Well two curve balls. 1). They were going to be eaten on the train my mom’s friends took into the city and 2). They were going to be eaten at 6:00am. Well, that criteria kind of killed a bunch of my ideas, save for one. MUFFINS!!!!!!

While I was initially going to use a use a recipe from a blog that I follow, I was at my local library (not surprising) when I stumbled upon a cookbook dedicated towards producing delicious muffins. After flipping through a few recipes, I decided the book was worth checking out. As I would soon discover, the book, Moufflet: More than 100 Gourmet Muffin Recipes That Rise to Any Occasion was written by fellow blogger, Kelly Jaggers of http://www.evilshenanigans.com. Divided into six chapters, the book covers muffin recipes that range from the decadent to the super savory. The last two chapters features a variety of spreads, glazes, and crumbles to top off your muffin creation. But with so many choices how on earth was I going to pick one? Well, since I had previously selected a recipe, mom had already told the others that I was baking muffins with blueberries. Given that little stipulation, I was considerably limited in which recipes I could go for.

Image

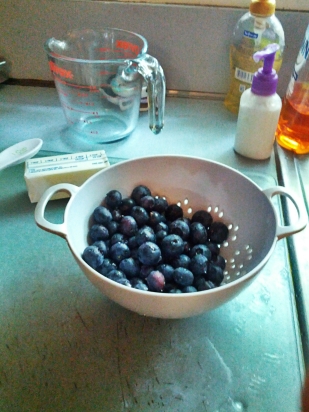
How could I pass up on a chance to use such beautiful blueberries?

As the title of the post says, the winning recipe was Blueberry Compote Sour Cream Muffins. Certainly a mouthful but with such a promising result. And while I have made blueberry muffins before, the incorporation of a compote presented a new challenge for me. The combination of the sweet berries mixed with the tartness of a lime juice ultimately produced a result I was extremely proud of. When combined with the sour cream based batter, the pale white mixture gradually turned a light purplish blue along with streaks of darker blue. It was quite the sight to behold.

Image

I kind of went a bit overboard with filters on my camera. Can you blame me when my phone camera takes better pics than my real camera?

Then of course, came the fun part, and no, that does not mean eating the left over batter (which I did do :P). To fill the cupcake liners, one had to follow a specific process: fill them up halfway with the batter, then the compote, and then finally, more batter to top it off. After that, its just a scant twenty minutes in the oven before you have yourself a lovely plate of muffins.

ImageI really loved the sort of tye-dyed effect that they had on the surface, it was different and, most importantly, it looked natural. No bizarrely colored muffin messes here! While the recipe said it would make about 18 muffins, I somehow managed to shrink the recipe down to 15.

Not sure how that happened but it is what it is. I kind of wish now that I made more just to keep on the side I’d need to go the store to get more blueberries.

Oh well, there is always next time.

Fresh Blueberry Compote Sour Cream Muffins

    Makes about 18 Muffins

    From Kelly Jagger’s Moufflet

1 ½ cups fresh blueberries*

1 tablespoon cornstarch

2 tablespoons sugar

1 tablespoon water

1 tablespoon fresh lime juice

2 cups all purpose flour

1 teaspoon baking powder

¾ teaspoon baking soda

½ teaspoon salt

1 cup sugar

⅓ cup butter, melted and cooled

1 teaspoon vanilla

½ cup sour cream

¼ cup half and half

2 eggs

*I followed the recipe exactly but in the end, I didn’t have enough compote for all the muffins. If you want to try the recipe, eyeball the amount of blueberries you use for the compote. Throw more in there if you think there should be more*

1. In a medium saucepan mix 1 cup of blueberries, the cornstarch, sugar, water, and lime juice. Cook over medium-low heat, stirring constantly, until thick and the berries have burst, about 10 minutes. Let the mixture cool to room temperature, then fold in the remaining blueberries

2. Preheat oven to 350F and prepare 18 muffin cups with nonstick spray, or line with paper liners

3. In a large bowl sift together the flour, baking powder, baking soda, and salt. Once sifted, whisk in the sugar until evenly mixed

4. In a separate bowl add the butter, vanilla, sour cream, half and half, and eggs. Whisk until the mixture is well combined

5. Make a well in the center of the dry ingredients and pour in the wet ingredients. With a wooden spoon or spatula, gently fold the mixture until just combined, about ten strokes. Do not overmix. Add half the blueberry mixture and just swirl it into the batter, leaving large streaks of blueberry

6. Divide half the batter evenly between the prepared muffin cups, and top with the reserved blueberry compote. Then top with the remaining batter. Bake for 18-20 minutes, or until the muffins spring back when gently pressed in the center and the tops are golden brown. Cool in the pan for 3 minutes, then remove the muffins from the pan to cool on a wire rack. Enjoy warm!