Recipe Write Up: Guacamole and Mushroom Fajitas

Sometimes, even I am impressed with how productive I can be in a single afternoon. Case-in-point. I prepared not one, but TWO dishes on Saturday. An appetizer/side dish + a main course. Not too shabby for someone who still struggles with turning on their mother’s gas stove. (Let’s just keep that between us, ok?)

How to pick a ripe avacodo? Hold it in your hand and apply gentle pressure. If it yields slightly, than its good to go!

How to pick a ripe avocado? Hold it in your hand and apply gentle pressure. If it yields slightly, than its good to go!

Additional highlights of Saturday’s cooking adventure include my first ever attempt at making guacamole. Here’s a spoiler: it came out great, even if I put in a whole onion instead of just a cup (Oops). At the same times, I was finally given a chance to break out my mortar and pestle, something I purchased months ago at Marshalls. IMG_20130720_185116_20130724190153675While it wasn’t performing the most important of tasks out there -my family’s pepper grinder broke and I needed to ground up some peppercorns- I got a kick out of using it. It might be small, but the thing definitely got the job done. Best $10 purchase ever!!!

One last thing before we get to what brought you here in the first place. I absolutely love cooking or baking with music playing in the kitchen. This time around I was first listening to the soundtrack from the film A Walk on the Moon. One can never go wrong with music from the Summer of Love playing in the background. For the fajitas, I decided to listen to, of all things, french music from the 1920s and 30s. Mexican food with French music? Sounds strange but it surprisingly works. Who knew?

Guacamole

 Taken from The Best of Cooking Light: Everyday Favorites.

1 cup finely chopped onion
1/4 cup minced fresh cilantro
2 tablespoons fresh lime juice
1/2 teaspoon salt
1/4 teaspoon ground cumin
1/4 teaspoon ground black pepper
2 ripe, peeled avocados, seeded and mashed

  1. Combine first seven ingredients in a medium bowl, stirring well.  Cover and chill before serving.

Yields about 16 servings

IMG_20130720_192800_20130724190518041

Portobello Mushroom Fajitas

 Taken from The Best of Cooking Light: Everyday Favorites.

1 tablespoon olive oil
4 cups sliced portobello mushrooms (about 8 ounces)
1 cup vertically sliced red onion
1 cup green pepper stripes (about 1/4 inches thick)
2 garlic cloves, minced
3 tablespoons chopped fresh cilantro
2 tablespoon fresh lime juice
1/4 teaspoon salt
1/4 teaspoon ground black pepper
1/4 cup mild salsa
12 (6 inch) flour tortillas
Shredded, Mexican cheese mix

  1. Heat oil in a large nonstick skillet over medium-high heat. Add mushrooms, sauté 5 minutes. add onion, bell pepper, and garlic. Reduce heat to medium and cook 4 minutes or until bell pepper is crisp-tender, stirring frequently. Lower heat to low and stir in cilantro, lime juice, salt, pepper and salsa. Don’t add too much salsa to the mixture, just enough to coat everything evenly.
  2. Warm tortillas according to the package directions. Spoon about 1/4 cup of mushroom mixture down the enter of each, add cheese before rolling. Coat with more salsa and cheese.

Makes about four servings (two or three fajitas each)


The Foodie Goes to the City

One of the wonders of living on Long Island is that New York City is just a train ride away. Believe it or not, until last Sunday, I had not been in the city once this summer! Talk about embarrassing. Clearly, it was high time I rectify this sad mistake. With the companionship of a dear friend, we took the city by storm, well, the Brooklyn part of it at least. So what exactly did we do? Well, we struggled to get on the Long Island Rail Road for one thing; remember, my friends and I kind of suck at organizing things. It took one or two failed attempts but hey, we finally got on board.

Now, I have thought long and hard about how to best describe this specific trip to the city with a single word but I think I have found the perfect word. You ready for this?

TORRID.

We walked about five or six miles that day and every minute of it was sweaty hell. Well, at least we had the beautiful buildings of Brooklyn to keep us distracted, albeit momentarily.

Image

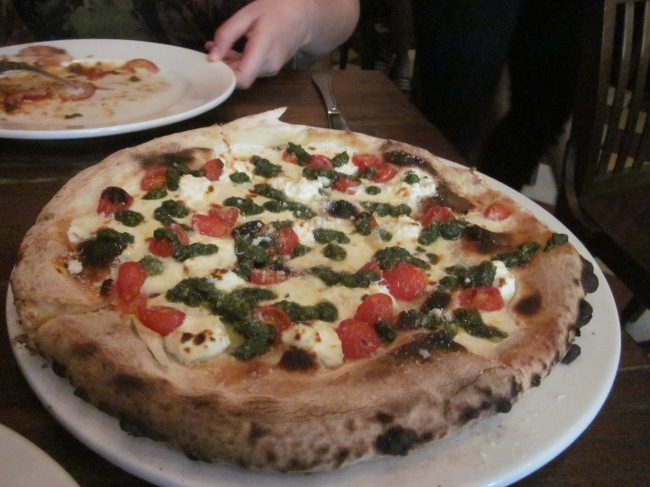
Now, if my friend and I were perhaps, sane, we would have done the responsible thing and have gotten out of the heat and settled into some nice cafe or something. But alas, we are rather silly people, people who will walk around in the oven that is the city streets for a good two hours before even considering the notion of going somewhere with both air condition AND lunch. Yes lunch, that nifty meal that many usually enjoy somewhere around midday. Not us of course. We didn’t eat lunch until four o’clock. But it was totally worth it. Tucked away in trendy Williamsburg is a little pizzeria that not only gives off a relax and somewhat artsy vibe, but may make the best pizza that my twenty-two year old self has ever had. Called Fornino, its tag line reads, “The Art and Science of Pizza”. With a title like that, you know that you are in for something good.

Image

Does that not look good enough to eat? Well it was! This specific pizza is called Genovoese. It has, as follows: Tomato, Pesto, Ricotta, Mozzarella, and Cherry Tomatoes. While we both could have gotten our own individually sized pizzas, we decided just to split one. I really can’t describe the food beyond this: pizza perfection. If you are ever in the Williamsburg area and need a good meal, please do yourself a favor and try Fornino. It’s worth it.

Now after a meal like that, it’s hard to believe that the day could get any better. Well it did! While walking around Williamsburg, I discovered my version of heaven. Whisk is shop the specializes in the selling of kitchenware. You can only imagine how hard I had try to control myself from buying everything in the store. From kitchenware to bakeware, to cookbooks and barware, this place really does have everything. And the shop itself is just adorable.

Image

I could have stayed in there for hours, just staring at everything they had. Truly, this is the kind of place that just screams “Come inside; buy things!” Thank god we had a train to catch or I might have pitched a tent and camped out there for the rest of my life. ImageIf I ever become a ghost, THIS is the shop that I am going to take up residence in. I’d be like Casper the Friendly Ghost, only with a poka dot apron. Now wouldn’t that be something?

All in all, this was a great city trip, even if we nearly fainted from heat exhaustion. While moving day to Boston is slowly getting closer, I plan on hitting up good old NYC at least once or twice more before then. There is just so much left to do and see before I move. Central Park, the Met, not to mention that there is not sales tax in the city.

Oh New York, you are truly a magical and wonderful place!

Recipe Write Up: Blueberry-Blackberry Pie Bars

IMG_20130713_205239_20130718180125168So sorry I haven’t posted anything in awhile, the last week has been pretty crazy. As I will discuss in greater detail in a future post, I was in New York City Sunday with a friend. Then on Monday, I took off to Boston to see a concert last night as well as to catch up with a buddy from my undergrad days. With so much traveling, walking, IMG_20130713_190840_20130718175738150and dying from the heat, I haven’t had a chance until now to share this simple yet yummy recipe.

Still a bit bitter about the whole egg white thing I decided that my inner baker need something of an ego boost. While the urge to do something ambitious was rather strong, I resisted the temptation and decided to try something a little less complicated though still highly satisfying to make. Bar desserts you see, have always been a thorn in my side. Sure, I can make a batch of brownies and blondies, but they never come out totally perfect, perfect in the sense of appearance not flavor. There is just something that bothers me when the shape is warped; it should be square or rectangle, not a convex polygon! However, it seems that the baking gods were on my side Saturday night since I nailed the flavor and shape! My little square pie (which it technically is) was met with rave reviews. I think my close friend’s reaction was the best. It kind of looked like this.

Gus's reaction say's it all: pure dessert bliss

Gus’s reaction say’s it all: pure dessert bliss

Ego boost achieved!

Blueberry-Blackberry Pie Bars

Adapted from a recipe found here

Ingredients
For the crust and topping
1½ cups all-purpose flour
¾ cup sugar
Pinch of salt
Zest of half a lemon
¾ cup (12 tbsp.) unsalted butter, cold

For the filling
2 large eggs
1 cups sugar
½ cup sour cream
6 tbsp. all-purpose flour
Pinch of salt
Juice of half a lemonIMG_20130713_205517_20130718180318859
1 tsp. vanilla extract
1 Full package of Blackberries (6 ounces)
8 ounces Blueberries

Preheat the oven to 350˚ F.  Line a 9 x 9-inch baking pan with foil and grease lightly.  In the bowl of a food processor or electric mixer, combine the flour, sugar, salt and lemon zest.  Pulse briefly to blend.  Cut the butter into small cubes, then add to the bowl with the dry ingredients.  Process in short pulses to cut the butter into the dry ingredients until only small pieces of butter remain and the mixture is crumbly.

Reserve ¾ cup of the mixture for topping the bars.  Add the rest of the mixture to the prepared pan and press to form an even layer of crust on the bottom of the pan.  Bake 12-15 minutes, until light golden.  Let cool 10-15 minutes before proceeding.

In a medium bowl, make the filling mixture.  Combine the eggs, sugar, sour cream, flour, salt, lemon juice and vanilla.  Whisk until smooth. Gently stir in the blackberries with a spatula.  Spread the filling mixture over the pre-baked crust in the baking pan.  Crumble the reserved topping mixture over the filling evenly.

Bake until the top is beginning to brown and the bars are just set, about 45 minutes.  Let cool completely on a wire rack.  Chill to firm up before slicing and serving.

Foodie Ramblings: Beating Egg Whites

Dear Readers,

As I discussed in last night’s post, understanding how to properly beat egg whites might be the thing that will be the difference from a baking success and a baking fail. If you are the type who has mastered the art of beating eggs into stiff and thick perfection, than kudos to you (super jealous BTW).But if you are like me and still struggling to figure it out, we are still at the point were some instruction is require. While there are a plethora of informative guides out there to help explain this process, the recipe I was using was not one of them.

Still a wee bit bitter about how things turned out, I decided to do some research about beating egg whites to figure out where things went wrong. Looking back on it now, I probably should have done this yesterday before I started baking but hey, live and learn right?

*Please note, I am not a science person by any stretch of the imagination, unless its forensics (WHOOT!). I have done my best to explain the more scientific stuff behind beating egg whites in a manner that someone like me (an idiot) would understand. I apologize to any science inclined people who may read what follows. Proceed with expectations set to low*

Fun fact first: Egg whites that are whipped with sugar are also referred to as meringues, so says How Baking Works by Paula Figoni. According to Ms. Figoni, meringue can not form without the combination of proteins that are found in egg whites. As the egg whites are whipped, air bubbles are beaten into the liquid and certain egg proteins unfold, creating a structure that traps and protects the air bubbles are breaking down.  Over time, the egg whites transform the from foam into a more stable mixture.

Clearly then, stability is key. Stable meringues should be firm but also flexible since it needs to withstand being folded and baked. At the same time, they should also have volume and lightness. Unfortunately, there are quite a few things that can affect that.

1. Sugar: This is basically the ingredient that stabilizes one’s whipped egg mixture. In the case of making something like a meringue, the sugar needs to be added slowly since the sugar crystals need a chance to dissolve within the egg white foam. If added too quickly, the proteins may not be able to unfold, which either leads to a softer meringue or whites that won’t whip at all.

2. Fats or lipids: These can mess up with the process of aeration either by slowing it down or preventing it from happening all together. Have you ever been cautioned about making sure no yolk gets mixed into your egg whites? This is why. Lipids interfere with the infolding of the egg proteins which affects the trapping of the air bubbles. If the air bubbles are contained properly, they will collapse.

3. Acids: Acids lower the pH of the meringue. Cream of tartar is the most common of acids used in whipping egg whites. This is an ingredient that should added early, as it will allow for the creation of a structure that will be flexible and stable.

4. Temperature: Egg whites should be room temperature, not chilled. Those right out of the fridge won’t whip well. Take them out in advance.

5. Whipping Time: If whipped too quickly or for too long, the meringue structure will begin to collapse and curdle.

6. Copper: Whipping in a copper bowl will increase a meringue’s stability similar to the way cream of tartar does; improves the flexibility and helps prevent over-whipping.

Ok, so the above are what can make or break one’s hopes of producing a perfect meringue. So what about the actual process? Well, the most basic and informative that I came across comes straight from my copy of Baking Illustrated. This is what they suggest.

1.Beat the egg whites and medium-low speed until froth, about 30 seconds. Raise the speed and add the cream of tartar to help stabilize the egg foam. Slowly add the sugar and continue to beat.

2. Just before the whites reach the proper consistency, turn off the mixer. Detach the whisk attachment and remove the bowl from the mixer. By hand, use the whisk attachment and give the mixture a few more strokes.

Soft peaks will droop slightly downward from the tip of the whisk; stiff peaks will stand tall.

So there you have it, an abbreviated explanation behind the science of beating egg whites, sort of. Hopefully, this information helps you as it will certainly help me in the future.

Till next time!

List of Sources

“Common Baking Problems and How to Avoid Them.” Baking Illustrated: A Best Recipe Classic. Ed. The Editors of Cook’s Illustrated Magazine. Brookline, MA: America’s Test Kitchen, 2004. 135-50. Print.

Figoni, Paula. “Eggs and Egg Products.” How Baking Works: Exploring the Fundamentals of Baking Science. Third ed. Hoboken, NJ: John Wiley & Sons, 2011. N. pag. Print.

Foodie Ramblings: Chiffon Cake Rant

The sensation of failure is not something that many actively seek out. While I am not completely pleased to admit this, tonight, I experienced another baking fail. This time around, it was a chiffon cake.  An olive-oil lemon chiffon cake if you want to be specific. For those of you out there who are scratching their heads and wondering aloud, “What is a chiffon cake?” here is a brief rundown.

Invented in the early part of the twentieth century, the chiffon cake is traditionally made with either vegetable oil or, in my case, olive oil. Unlike its well known cake cousin, the angel food cake, a recipe for a chiffon cake calls for both egg whites and egg yolks. While the egg yolks are mixed in with your flour mixture, the egg whites are whipped into a frenzy until they are stiff and thick. This creates the airiness that distinguishes a chiffon cake from the other cakes in the club. Seems pretty straight forward right? That is, unless you are using a recipe that isn’t coming out of a cookbook like Baking Illustrated, where the authors comfortably hold your hand as they lead you through the world of baking. In cookbooks like BI, they authors aren’t trying to be fancy or pretentious; they want the people who purchased their book to feel comfortable in the kitchen, especially when they are trying something new.

This was not the case for the recipe that I used. Instead of trying to be humble and informative, this recipe decided to be hip and trendy by promoting itself as a “skinny” recipe, only 260 calories per serving. Oh boy!!!! While I am all for eating healthy and what not, sometimes recipes are the way they are for a reason. In the case of this cake, the recipe didn’t ask for stiff and thick peaks, rather, it asked for peaks that were “just about stiff”. What the hell does that mean? As I have already explained, baking with egg whites has never really been my specialty. While I now know how the process goes in regards to beating egg whites until they are stiff and thick, I have never done it myself. Even so, I can figure something like that out by keeping an eye on the egg whites. When they’re thick and stiff, it’s somewhat hard to not notice. But what about egg whites that are just about stiff? How does one figure that out? I certainly didn’t know the answer and the recipe clearly wasn’t going to tell me either. So I did what I thought was best, I put total faith in the recipe and went with my gut. Talk about a great idea!

tumblr_m2nih8I3le1qa86mcWith my eggs sort of but not really stiff, and combined with all the other ingredients, it was time to put it in the oven. Ok, that shouldn’t be too hard. Right? Wrong! Having a tube pan that leaks batter sure complicates things. Thank god that I had my trusty bundt pan on hand. Clearly, tonight was not my night for baking. So how did this more trouble then it’s worth cake come out? Eh. Not amazing, but not totally horrible either. The flavor was great, the structure, not so much. This was 100% due to the egg white thing. However, I can’t totally blame the recipe for what happened. I’ll be honest, I probably didn’t beat the eggs enough. True, I didn’t know what I was doing, but still, they should have been thicker. Still, this doesn’t excuse the recipe. It was far too vague regarding what the egg whites should have looked like and that def did not help me out.

So all in all, what did I learn tonight?

1. When making a chiffon cake, make sure you have egg whites that are stiff and thick, even if the recipe is too pretentious to admit it.

2. Check your tube pan before using it. Even if it seems ok, set it on top of a cookie sheet lined with parchment paper before baking. Just to be on the safe side.

3. Approach recipes that are coming from a questionable source with caution. While there is nothing wrong with trying a recipe out of magazines like Taste of Home and Bon Appétit, keep in mind, those magazines are written by people who know food. I pulled this recipe out of fitness magazine and that should have been red flag at the start.

4. Getting lemon juice in your eye hurts like hell.

Till next time.

Foodie Ramblings: Masterchef

Finishing off a long weekend with mom by marathoning Masterchef USA while flipping through the Masterchef cookbook we checked out of the library. Talk about a great find! You see, mom and I have been big fans of the show since its first season, and we always enjoy seeing what the contests cook during each episode. Come Wednesday nights, you can always find us sitting in the den watching intently. Actually, I think my mom is more excited about having the cookbook than I am; if that’s possible. She keeps pointing out and bookmarking recipes. Clearly, we’re going to be spending some quality time with this cookbook for the next two weeks.

You know, I’ve noticed a change in my mom’s attitude towards food lately. She probably won’t admit it, but I think is starting to become something of a foodie herself. Give me time, I’ll get her to join the dark side eventually.

tumblr_m9zilv89Ti1qegw8v

Mwahaha!!!!!!

Recipe Write Up: Strawberry Rhubarb Crisp

Rhubarb is an interesting fruit. For someone like me, who until a few days ago had never even tried it before, the taste is one that can catch one off guard. It’s sweet, kind of. It’s also tart, but not too tart. When paired with strawberries, the two play off the others distinct flavor profiles, creating a new flavor that is just makes your mouth water. Throw in a buttery crumb topping and you have a summer dessert that anyone should be proud of.IMG_4188

This dessert is a milestone moment for me: it is my first time making a crisp! Needless to say, I as a bit worried about mucking the recipe up. While I wasn’t bracing myself for another food disaster (unlike a certain chocolate cake), I was a wee bit worried about preparing the rhubarb. As you will see below, the recipe asks for four cups of peeled rhubarb. Not totally sure about peeling rhubarb, I went to my go-to source, Baker’s Illustratedjust to verify that peeling was indeed the right way to go. Although BI insisted that peeling rhubarb was the correct thing to do, I wasn’t 100% convinced so I sought aid from the internet. Apparently, there is a big debate surrounding rhubarb. To peel or not to peel. Some sources say yes, others say don’t, that peeling rhubarb will remove some of the flavor. Slightly worried about what to do, I decided to go with the directions in my BI. The process was a bit tedious since I did have a quite a bit of rhubarb to go through and a cat that wouldn’t stop playing with the shavings but an hour later, the rhubarb prep was over!!!! Throw in my slices of strawberries and the two made quite the pair. IMG_4200

In the end, peeling seemed like the right choice. The flavor was still there though I am curious about trying it the other way next time. As for the family? They loved it, marking this as a new family favorite. Except for my older sister. She is allergic to strawberries. Ooops. Sorry D.IMG_4202

Strawberry Rhubarb Crisp

From The Back in The Day Bakery Cookbook (serves 8 to 10)

For the Topping:
1 cup of unbleached all-purpose flour
1/2 cup of packed light brown sugar
3/4 cup of old fashioned rolled oats
2 tablespoons yellow cornmeal
2 teaspoons of ground cinnamon
1/4 teaspoon fine sea salt
8 tablespoons (1 stick) cold unsalted butter, cut into 1/2 inch cubes
1 tablespoon of canola oil

For the Filling:
2 cups of strawberries
4 cups 1-inch pieces peeled rhubarb
1 1/4 cup turbinado sugar*
3 tablespoons of unbleached all-purpose flour
1 tablespoon cornstarch

*If you do not have turbinado sugar like I didn’t, you can substitute it with brown sugar. Don’t worry, the required amount stays the same.

Method:
Position a rack in the lower third of the oven and preheat the oven to 350 degrees. Butter a 9-inch deep-dish pie plate and line a baking sheet with parchment.

Topping: In a medium mixing bowl, stir together the flour, brown sugar, rolled oats, cornmeal, cinnamon, salt, butter, and oil with a fork hand mixer on low until completely blended. Set aside.

Filling: In another bowl, combine the strawberries and rhubarb with the turbinado sugar, flour, and cornstarch, stirring to coat the fruit.

Pour the fruit mixture into the prepared pie plate. Sprinkle the topping evenly over the fruit mixture. Place the pie plate on the prepared baking sheet. Bake for 40 to 45 minutes or until the fruit is bubbling around the edges and the top is golden brown and crispy. Let cool slightly.

Serve the crisp warm. It is best served the same day, but it can be covered with plastic wrap and refrigerated for up to 3 days.

Enjoy!!!!

The Foodie Goes to Market

I am somewhat ashamed to admit this but until this past Sunday, I had never had the pleasure of visiting a farmer’s market. True, I have been to the Shuk in Jerusalem, which is a partially opened market where vendors of all sorts gather, but I didn’t really appreciate the experience when it occurred. Probably because I was an idiot and wore open toed shoes when I visited. Note to anyone who is thinking about planning a trip to the Shuk in Israel: DON’T WEAR FLIP FLOPS OR SANDALS!!!! Your toes will be crushed by carts or stomped on by pedestrians determined to get that last cabbage head.

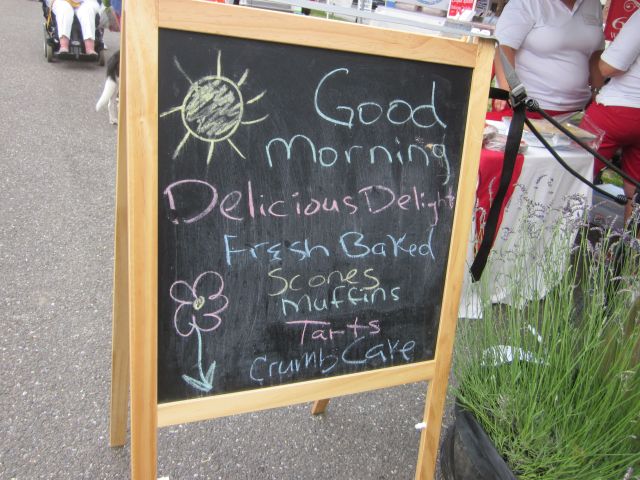
IMG_4181Thankfully, the farmers market that I attended was far less competitive and overwhelming. While it certainly wasn’t the biggest farmer’s markets out there, the size was just right for a first timer for me. For one thing, I didn’t feel rushed and intimidated as I took a quick stroll around. All around were people from the area, curious just like me to see what the vendors were selling. Although it was early on Sunday morning, the place was plenty crowded; some vendors were already sold out of some of their products. After one stroll around, I knew I was in love. After being surrounded by all the fresh produce, herbs, cheeses, and baked goods, I have decided that attending farmer’s markets should become my new hobby. IMG_4178Truly, I wish my eyes had been opened to how awesome these things are years ago! From a foodie’s standpoint, I couldn’t help but daydream about the different dishes I could make with all the different produce on sale. True, it was a bit more expensive than what you might find at a grocery store, but the quality more than makes up for it. Additionally, I stumbled upon some ingredients that I have never seen in stores. Like lavender. This is an ingredient that I have always wanted to get my hands on; what can I say, the idea of lavender cupcakes sounds too good to not try. However, I have always wanted to buy it IMG_4182fresh rather than through amazon.com. And finally, after two years of yearning, there it was, right in front of me!!!!! Dreams really do come true!

Unfortunately, I didn’t have enough money on me to buy it but I wasn’t too upset. This particular farmer’s market will be happening every Sunday in town for the remainder of the summer. I can promise you that I’ll be going back this coming weekend.

If any of you live in the Boston area and know of any local farmer’s markets, let me know. I’ll be moving there in September and would love to check them out.

Recipe Write Up: Stovetop Broccoli and Cheese Chicken Pasta

Recall how awhile ago I referred to something called the parent factor? If not, here is a bit of a refresher. The parent factor refers to what happens when my parents personal preferences clash with mine. Case in point, I love frosting, my parents do not. When I am baking at home, frosting is a no-no. Taadaa! The parent factor! What does this have to do with today’s post? Well last week, the parent factor came into play yet again. This time, it was over dinner.

IMG_4175

As I have mentioned before, my mom isn’t the most flexible eater out there. She knows what she likes and that is the simple stuff. With a fridge not exactly full, our options were somewhat limited. Now, had my mom had her way, we probably would have had oatmeal or sandwiches for dinner. However, I was not going to let that happen. With a quick assessment of our options in the fridge and what we had down in the pantry, I hopped online to find a simple recipe for dinner. Keeping in mind my mother’s picky tastes, I had quite a bit of recipes that I needed to overlook. It took sometime, but eventually, I hit the jackpot! All I needed was some chicken, broccoli, milk, pasta, and cheese. Lady Luck was definitely on my side since we just so happened to have all of that stuff lying around. On top of that, what I ended up finding was not only easy to make, but quick to put together. It doesn’t get any better than that! As for mom, she was content with the dish though she made it known to me that if she had been on her own, she would have just gone with oatmeal. Oh mom.

Stovetop Broccoli and Cheese Chicken Pasta

Recipe adapted (slightly) from http://picky-palate.com

1/2 pound Pasta (any kind)
1/2 stick Unsalted Butter
1/4 cup All Purpose Flour
1/2 teaspoon Kosher Salt
1/4 teaspoon Ground Black Pepper
1 1/4 cups Low Sodium Chicken broth
3/4 cup Shredded Cheese (we used mix cheese though cheddar works as well)
1 cup Shredded Chicken
1/2 pound Broccoli Florets, steamed
3/4 cup Milk

1. Prepare pasta according to package directions, drain and run under cool water to stop cooking.

2. Melt butter into a medium saucepan over medium heat. Whisk in flour, salt and pepper, whisking until thick and combined. Slowly whisk in chicken broth until combined. Increase heat to high and whisk until thick and bubbly. Reduce heat to low and stir in cheese until melted.

3. Transfer cooked noodles to a large dutch oven or pot over low-medium heat. Add chicken, broccoli and cheese sauce, stirring; will be thick. Stir in milk to loosen sauce to your liking. Serve immediately. This dish does best when served as soon as possible. If needed to be prepared ahead of time, add additional milk or chicken broth to loosen sauce

IMG_4177

(Should make about 3-4 servings but ours was more like 4-6. Not sure how that happened)

Till next time,

Litbaker