Passover Recipes that Will Make Your Mama Say Oy!

Passover is one of those Jewish holidays that I absolutely love in theory yet totally hate in practice. On one hand, you get to eat delicious food with close friends and family while re-telling the story of the Jewish peoples epic flight for freedom in ancient Egypt. And there’s wine, a lot of wine. Four full glasses of wine to be exact that have to be fully drained before moving on to the next one. And when you are using an abridged Haggadah like I did, the gaps of time between each glass is infinitely shorter than they probably should be. On the other, you can’t anything made with flour which seriously limits your daily food intake. But hey, I get to drink four glasses of wine in one go. Can’t really complain with that.

However, Passover is more about drinking until we are too merry to realize that we are slathering our matzoh with horseradish and not butter. Its about celebrating our freedom from slavery. WOOT! Of course there is a whole lot more to the story than just that but I won’t bore you with the details. What you should do is go out and either watch the film, The Prince of Egypt (which is kick-ass) or that episode of the Rugrats. Both do an excellent job of re-telling the story of Passover in a fun and colorful, but also represent an awesome time in 1990s animation.

prince-of-egypt-red-sea-o


The Prince of Egypt currently available on Netflix so do take advantage of the fact that it is out there for easy viewing. Just do not watch Dreamwork’s follow up film, Joseph, the King of Dreams. A cinematic master piece it is not!

tumblr_m1turiRPKc1r9c63ao1_500


Also, I had a professor who was used as a historic consultant in the movie which only makes the film more awesome!

Now that I’ve skirted around the topic of explaining what Passover really is, I can get to the fun part of this post: THE FOOD!

Believe it or not, Passover is not all about stuffing our faces with matzoh for eight days. Personally, I like to think of Passover as one big epic food challenge. How many dishes can you come up with that do not include any leavening agents? As it turns out, not every Passover recipe has to be a matzoh sandwich with cheese. There are other options out there.

This year for Passover, I decided to try my hand at making something new, haroset. What’s that? It’s an apple based spread that we eat with matzoh. Most commonly, people make a sandwich of matzoh, haroset, and horseradish. At the same time, I absolutely needed to make my mom’s Passover friendly macaroons, a recipe that my sister freaked when she heard I had it memorized. Seriously, they are that good.

Hope you enjoy and happy Passover!

10171010_10152415721454017_463623114820427426_n

Passover Macaroons

(Adapted from the always useful, The Joy of Cooking)

One 14oz can of sweetened condensed milk

1 large egg white

1 1/2 teaspoons vanilla

A pinch of salt

One bag of shredded, sweetened coconut

1 bag of chocolate chips, either normal size or mini.

Preheat oven to 325. Mix everything together in a large bowl until 100% combined.

Break out the cookie sheets and line with parchment paper. Scoop tablespoon sized portions of the mixture onto the cookie sheet and bake for about 20 minutes, or until the coconut has toasted on top and the sides have browned.

My Own Haroset Recipe

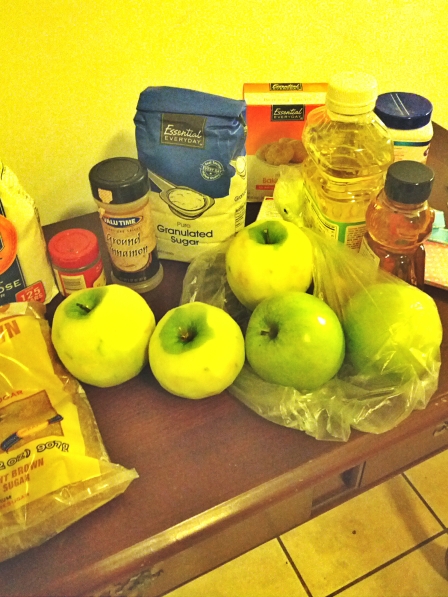
3 Fuji apples, peeled and sliced

1 cup of chopped walnuts

1 cup of golden raisins

3 tablespoons of honey

1 1/2 teaspoon of cinnamon (or however much you think is needed)

1/2 teaspoon cloves

1/4 cup of either grape juice or a sweet red wine

Combine all together in a big bowl and chill until ready to serve.

Super Un-Official Hiatus is Now Over + Pumpkin Whoopie Pies

Hey there cyber world, look who is back in action!!!!!!! So I know that I probably have a lot of explaining to do but fear not, all your questions will be answered in a nice, orderly fashion.

  • Where the hell have you been? I’ve been in Brighton, a part of Boston, transitioning from being a lazy college graduate to an over-stressed grad student. Turns out this transition has been a bit trickier than anticipated. I went from having tons of free time to having barely any. Blogging takes some time, not a lot or anything, but it takes some. Between classes, homework, my internship, nannying, and just getting by, its been hard to find some time time. Basically, what I need to start doing is setting aside some time once a week for blogging.
  • Have you been baking? um, this week I did. Basically, this excuse applies to the first one. Time is a big part of baking and finding a good two hours or so to just focus on baking has been tricky but hey, I’m trying to make it work. Especially now that I have some extra money from job. Believe it or not, but I can actually afford to buy ingredients again! YAY! I might not be able to bake or cook something once a week, but I’m gonna aim for once every two weeks.
  • How are classes? Why thank you for asking. Classes have been good. Been learning a lot about the world of library and information professionals such as cataloging, metadata, library history, and the ins and outs of archiving. For the most part, things have been easy, but the assignments for my information organization class (cataloging etc) have been mega time killers. Thank god my classmates are super nice and are open to working together on assignments. You know the saying, strength in numbers.
  • How is Boston? fantastic! I love living here; there is always stuff to do which is a big change when compared to last city I lived in *cough* worcester *cough*. For the first time, I’m not restricted by not having a car. In Boston, you can go almost anywhere with the T or by foot. And since I’m such a big fan of walking, I have really gotten the chance to do some urban exploring. This how I discovered that I live right near a giant reservoir, one that is perfect for runners. I’ve gone jogging there a few times and I really enjoy being around other runners again
  • What else is new? well, a group of friends from home and I have decided to start to book club that we call “The Throw back Book Club”. It’s all for fun but what’s cool is that we are reading books from our childhood. This month we’re reading Harry Potter and the Sorcerer’s Stone. Remember that one? So far its been great re-reading it, each chapter brings back memories of the first time I read it. What else???? I’m interning at a historical commission for the city of Cambridge which is turning out to be super cool. I basically get to handle old documents, photographs and other things as I sort through them to form a collection. Oh, and I went to Harpoon Brewery’s Octoberfest. That was freak’n awesome!
  • What about those whoopie pies? see recipe below.
Whoopie pie success!

Whoopie pie success!

Pumpkin Whoopie Pies

Recipe adapted from created by The Baker Chick 

Ingredients for the cookies

  • 3 cups all-purpose flour
  • 1 tsp. salt
  • 1 tsp. baking soda
  • 1 tsp. baking powder
  • 2 tbsp. cinnamon
  • 1 tsp. ground ginger
  • ½ tsp. ground nutmeg
  • 1 cup granulated sugar
  • 1 cup dark brown sugar, firmly packed
  • 1 cup canola oil
  • 1 15 oz can of pumpkin puree
  • 2 large eggs
  • 1 tsp. vanilla extract
  • For the Filling
    • 3-4 cups powdered sugar
    • ½ cup unsalted butter, at room temperature
    • 8 oz. cream cheese, at room

In a medium bowl, whisk together flour, salt, baking soda, baking powder, cinnamon, ginger, and nutmeg.

In another bowl, whisk sugars and oil together. Add the pumpkin puree and combine thoroughly Add the eggs and vanilla and mix until combined. Slowly mix both mixtures until just combined.

With a small ice cream scoop, form a tablespoon of dough and place on baking sheet about 1 inch apart. Bake for 10-12 minutes, until the cookies are just starting to crack on top and an inserted tooth pick comes out clean. Remove from the oven and let cool for 5-10 minutes. Transfer to wire rack to cool and repeat with remaining dough

For the Filling With an electric mixture, beat the butter and cream cheese in a bowl until smooth. Add the powdered sugar, vanilla and beat until smooth. If you want to a firmer filling, add more powdered sugar.

To assemble, either pipe or use a knife to spread the filling on the flat side of one of the cookies before topping it with another cookie. Press down slightly so the filling spread. Repeat until all cookies are completed. Refrigerate for about a half an hour before serving.

Behind the Curtain Dessert Challenge: Apples and Cinnamon + a Little Honey

Shana Tova everyone! Or in English, Happy New Year. Now I know what you are thinking ‘she’s lost her mind’ but trust me, I haven’t. You see, last week was the Jewish holiday of Rosh Hashannah, or the Jewish new year. However we aren’t just wishing our peers a happy new year, we are wishing for a sweet new year. Why sweet? Well why not? Ok, I’ll admit, I don’t entirely know why we wish specifically for a sweet new year but hey, why spoil a good thing? And you want to know what’s a good thing? Dipping freshly cut apples into gooey, warm honey. Sure Jews don’t get to have the twelve days of Christmas but who needs that when you have apples and honey. Shana Tova indeed!

IMG_20130906_142332_20130911205259625

Now normally I spend Rosh Hashannah at home or with friends but since I just moved to Boston, heading home wasn’t exactly an opinion for me. However I decided that even if I couldn’t enjoy the holiday with my friends or family, that didn’t mean I had to miss out on all the fun. So, I did what I do best. I baked. Combing the best of both worlds, I made a deliciously festive apple honey cake. But wait, it get’s better! Just as I was prepping for the baking process, Sheryl from Behind the Curtain Baking Challenge posted the flavor theme for the month of September. Apples and Cinnamon. How perfect was that? So behold dear readers, my apple cinnamon + honey cake. I also want to point out that this is the first thing I have baked in my new apartment.

Two sides notes:

1). I didn’t make the icing due to not having the ingredients/ not having it in my budget to pay for powder sugar. Now that I have a job (yay) I hopefully can buy powder sugar soon

2). Please pardon the pictures; without a window and limited lighting, the images have come out a bit dark.


IMG_20130906_164832_20130911205508778

Apple Cinnamon + Honey Cake

Adapted from a recipe found here

Ingredients

  • 3 eggs
  • 3/4 cup honey
  • 1/2 cup white sugar
  • 1/4 cup light brown sugar
  • 1 1/4 cup canola oil
  • 1 1/2 tsp vanilla
  • 3 cups all purpose baking flour
  • 1 tsp baking powder
  • 1 tsp baking soda
  • 2 tsp cinnamon (could also be 1 1/2 tsp depending on taste preference)
  • 3/4 tsp salt
  • 1/4 tsp allspice
  • Dash of ground cloves
  • 3 Granny Smith apples – peeled, cored, and shredded

Preheat oven to 325 degrees F. In a large mixing bowl, beat the eggs until they are frothy. Whisk in the honey, white sugar, brown sugar, oil and vanilla. In a separate medium mixing bowl, sift together the flour, baking powder, baking soda, cinnamon, salt, and spices. Incorporate the flour mixture into the liquid, stir to blend. Fold in the shredded apples.

Spray your 9 inch Bundt pan with cooking spray, making sure to evenly coat the entire inner surface. Pour your batter into the pan. Bundt pan depths vary, so make sure the batter fills the pan ¾ full or less. Do not fill beyond ¾ or your cake might overflow during baking. Use a spatula to gently push the batter to the outside of the pan, pushing slightly up the walls. This will help to get rid of any air pockets that might interfere with the pretty details of the pan. Smooth the batter on the top so it is flat and even all the way around the pan.

Bake cake in preheated oven for 75-90 minutes. When the edges darken and pull fully away from the sides of the pan, and the cake browns all the way across the surface, insert a toothpick deep into the thickest part of the cake. If it comes out clean, it’s done. It’s a very moist cake, so it’s easy to undercook it– err on the side of caution and let it bake a little longer if you’re unsure (but don’t bake it too long or it will dry out!).

Let the cake cool for exactly 10 minutes, then invert it onto a flat plate. Tap the Bundt pan gently to release the cake. If your cake sticks, use a plastic knife to carefully loosen the cake around the center tube and sides. Allow cake to cool completely. Serves about 10

Powered by Linky Tools

Click here to enter your link and view this Linky Tools list…

Blueberry and Nectarine Buckle

I have noticed something in the last few weeks, perhaps you have to. It seems that I have unintentionally become the queen of the crisps and cobblers. I’m not totally sure how this happened; I don’t recall pulling a sword out of a stone nor do I remember a long lost grandmother inviting me over to her mansion for tea before dropping the royal bomb.

    My exact reaction if my grandmother WAS either a queen or Julie Andrews

My exact reaction if my grandmother WAS either a queen or Julie Andrews

Seriously, when I was baking this dessert I found myself thinking, “Gee, I have been making a lot of stuff with crumb toppings lately.” One look at my blog later and I realized that throughout this summer I have made a crisp, a streusel, ‘pie bars’ which are essentially a kind of cobbler, and now, I am adding a buckle to the mix. See what I mean about being queen of the crisps and cobblers? As much as I do enjoy being the queen of something, I think I will be handing in my crown soon. All of these recipes have been super delicious but I think after this one, I’m gonna try and do something a little different. I will add the the combination of blueberries and nectarines makes for an absolutely mouth watering summer dessert. While nectarine season may be ending, give this dessert a shot next summer; your family will thank you for it.

Prep bowls for the win!!!

Prep bowls for the win!!!

By the way, if you are like me and have no idea what the difference is between a buckle and a crisp, let me enlighten you.

A buckle: These desserts are a single layer, have fruit in the middle, and feature a streusel like topping, which gives the dessert its buckled  appearance

A crisp: Baked with fruit (duh) and have a crumb topping. Similar to a buckle, neither dessert has a bottom.

A cobbler: A deep-dish dessert with a fruit filling and a thick topping.

A brown betty or betty: Usually made with apples but other fruit can be used as well. Unlike the other three, this dessert is layered, with the fruit sandwiched between a crumb crust and topping. *Given this information, I think my strawberry-rhubarb dessert is technically a betty not a crisp*

Blueberry and Nectarine Buckle

From The Sono Baking company Cookbook Serves 8 to 10

Streusel Topping
1 cup all purpose flour
1 cup light brown sugar
1 teaspoon coarse salt
1/2 teaspoon ground cinnamon
1/2 cup (1 stick) cold, unsalted butter, cub into small cubes

1 1/4 cups all purpose flour
2 teaspoons baking powder
1 cup (2 sticks) unsalted butter, at room temperature
1 cup granulated sugar
1/2 teaspoon coarse salt
4 large eggs
2 teaspoons purse vanilla extract
2 cups blueberries’2 cups diced (!/2-inch) nectarines (about 2 nectarines)
Confectioners’ sugar

1. To make the streusel: In a medium bowl, use a fork to stir together the flour, brown sugar, salt, and cinnamon. Add the butter, and using your fingertips, quickly work it into the dry ingredients until pea size crumbs formal set aside in the fridge

2. In a medium bowl, whisk together the flour and baking powder; set aside

3. Set the oven rack in middle position. Preheat the oven to 350F. Butter a 9 by 12 inch baking dish; set aside. Pull a baking sheet to set the dish on while baking

4. In the bowl of a standing mister fitted with the paddle attachment, beat the butter, sugar and salt on medium-high speed until light and fluffy, 2 to 3 minutes. Beat in the eggs one at a time, and then the vanilla. On low speed, beat in the dry ingredients just until absorbed. Fold in the fruit. Transfer to the prepared baking dish. Sprinkle the streusel over the top

5. Set the baking dish on the prepared baking sheet. Bake, rotating the sheet about two thirds of the way through the cooking time, until a cake tester interred into the thickest part of the buckle comes out clean and the topping is nicely browned and crisp, 30 to 35 minutes. Transfer to a wire rack to cool for 10 minutes. Dust with confectioners’ sugar and cut into squares.

I ended up using margarine for some of my butter so mine may be a bit more buttery than it should be

I ended up using margarine for some of my butter so mine may be a bit more buttery than it should be

Behind the Curtain Dessert Challenge!!!!! + Recipe Write Up: Peaches and Cream Streusel Bars

Over the last few years, I have become quite the blog reader. What started with just a few websites has grown to be a folder that includes about 30 or so links to various blogs. Besides reading about different recipes, ogling beautiful food photography, and obsessively clicking through various blogrolls, I have, on occasion, come across a post or two that would mention the phrase ‘blog hop’. Confused, I did what any child of the internet era would do, I went to Wikipedia to give me an explanation. Well, when good old Wiki let me down, I did the second best thing out there on the internet, I Googled the term. This is what I learned.

Blog Hop

A blog hop is a set time frame where a group of authors post about a topic and share links to the other blogs so readers can go to them.

Amused and inspired, I decided to get in on the blog hopping action. The group that was crazy enough to accept a novice food blogger like myself? Behind the Curtain Dessert Challenge. While some blog hop groups like to bake/cook their way through cookbooks, this group dedicates each month to a different flavor combination. Last month, for example, was blueberries and lemon. Remember that lemon chiffon cake that I ranted about? Yea, that was supposed to be for July’s blog hop. Well, I can proudly say that I not only managed to complete my dessert on time, but that it came out tasting fantastic as well.

For August, the flavor combination was peaches and cream. Since I had never baked with peaches before, I was super excited to be able to participate. As for what to bake, I decided to do another bar desserIMG_20130804_160742_20130807194903214t. After all, the last bar dessert I made came out great! I strongly suggest   giving this recipe a try while peaches are still in season. I can assure you, you and whoever you feed these bars to, won’t be disappointed.

Special thanks to Sheryl of LadyBehindtheCurtain.com for creating this blog hop as well as letting me participate. Congrats to everyone else who participated this month as well.

IMG_20130804_202125_20130807195222445

Peaches and Cream Streusel Bars

Adapted from a recipe found at sallysbakingaddiction.com

Crust and Topping
1 cup all purpose flour
1/2 cup old fashioned rolled oats
1/3 cup light brown sugar
10 tablespoons unsalted butter, cold and cubed
1/2 teaspoon ground cinnamon
A pinch of nutmeg

Peach Filling
1 Large Egg
1/2 cup granulated sugar
1 tablespoon all purpose flour
1/4 teaspoon salt
2 medium peaches, peeled and chopped (should be about 1/2 cup)

Vanilla Glaze
1/2 cup confectioners’ sugar
2 teaspoon milk (may need more depending on what consistency you want)
1/2 teaspoon vanilla extract

1. Preheat the oven 350F. Line an 8×8 baking pan with aluminum foil with enough hanging on the sides for removal. Spray with nonstick spray.

2. For the crust and topping: whisk the flour, oats, brown sugar, until combined. Add the cold putter and mix with food processor or fork until it becomes coarse and crumbs and small and pea sized. Remove 3/4 cps of the mixture and set aside in small bowl. This will be the top crust. Add 1/2 teaspoon of cinnamon and the nutmeg and mix to combine. Press the remaining mixture into the prepared pan evenly and bake for 15 minutes.
*You can add 1 whole teaspoon of cinnamon to the crust/topping before dividing it up too. I did it this way because I forgot to add the cinnamon until after the crust was in the oven*.

3. For the filling: whisk the egg and sugar together until smooth and creamy. Add the flour and salt. Whisk until combined. Fold in the peaches. Pour the filling over the hot crust and cover with the remaining crumb topping. Bake for 30-32 minutes or until golden brown on top. Let cool in pan for about a half hour before removing. Place in fridge to chill for two hours before serving.

4. For glaze: Whisk the confectioners’ sugar, milk, and vanilla extract together until smooth. Drizzle over dessert. (I took mine out of the fridge halfway through, drizzled the glaze and put it back in the fridge to set).

IMG_20130804_204255_20130807195146155

Powered by Linky Tools

Click here to enter your link and view this Linky Tools list…

Recipe Write Up: Lemon Pancakes with Mixed Fruit

IMG_20130721_140443_20130729194855367I’m going to be honest here, I am not really a big fan of breakfast. While some people may enjoy making the meal a big affair, determined to cram in all of the major food groups onto one plate, I’d much rather sleep in and miss the whole thing. In fact, when I was an undergrad, this was the meal I was most likely to skip. Now don’t go thinking that I hate breakfast as a whole. Personally I agree that one is much better off starting their day with a healthy meal than waiting a good four hours for lunch time. The food on the other hand, not really my type of stuff. Sure, I’ll nom on a bowl of cereal and have a glass of juice, but outside of these and a few other choice items, I really don’t like anything else. Bacon and sausage? Not things I grew up eating so a natural distaste for them already, Eggs? Maybe for an early lunch but never for breakfast. Waffles? Eh.

Now before going further, I will say that I love french toast, muffins, and oatmeal. See, I’m not a total loser. But if you’ve noticed, I left one breakfast item out. Pancakes. Do I like them or hate them? Well, thanks to Ihop, I hate them. From the taste to the texture, these things are really not my cup of tea. It’s almost sad how one bad experience with something can forever change one’s opinion towards it. Sure, I’ve tried to overcome it but alas, it never seems to end well. The pancakes are either too doughy or just lack flavor. Additionally, I always feel like I have digested an anvil after eating a plate of the little saucers from hell. However, I am proud to report that my opinion of pancakes has started to shift.

For the first time in years, not only did I find myself craving pancakes, I wanted to make them myself, from scratch! Turns out, it’s true what they say about things being homemade, the difference in taste is astonishing. I think if I’ve had more homemade pancakes in my life than perhaps I would have seen the light sooner. Well, I guess better late than never. Hopefully my future Boston roommates like lemons and pancakes since I’ll definitely be making these again.

Lemon Pancakes with Mixed Fruit

From Masterchef: The Ultimate Cookbook

1 cup all-purpose flour
1 tablespoon granulated sugar
1 teaspoon baking powder
1/2 teaspoon baking soda
1/4 teaspoon salt
1 cup buttermilk
3 tablespoons whole milk
1 large egg
2 tablespoons melted unsalted butter, plus about 2 tablespoons for frying
2 teaspoons finely grated lemon zest
1/2 cup fresh blackberries
1/2 cup fresh blueberries
1/2 cup fresh raspberries
1/2 cup confectioner’s sugar

  1. Whisk the flour granulated sugar, baking powder, baking soda, and salt in a large bowl to blend. Whisk the buttermilk, milk, egg, melted butter, and lemon zest in a medium bowl to blend. Keep the two mixtures separate until ready to cook.
  2. Heat a heavy griddle or skillet over medium heat. Once hot, coat the griddle or pan with some butter. Pour the wet mixture into the dry mixture and stir until a slightly lumpy batter forms. Using about 1/2 cup of the batter for each pancake, pour the batter onto the griddle, evenly spacing the pancakes. Cook until golden brown and puffed, about 2 1/2 minutes per side.
  3. Divide the hot pancakes among four plates, top with berries, east with confectioner’s sugar and serve.

Should make about 8 pancakes.

Recipe Write Up: Blueberry-Blackberry Pie Bars

IMG_20130713_205239_20130718180125168So sorry I haven’t posted anything in awhile, the last week has been pretty crazy. As I will discuss in greater detail in a future post, I was in New York City Sunday with a friend. Then on Monday, I took off to Boston to see a concert last night as well as to catch up with a buddy from my undergrad days. With so much traveling, walking, IMG_20130713_190840_20130718175738150and dying from the heat, I haven’t had a chance until now to share this simple yet yummy recipe.

Still a bit bitter about the whole egg white thing I decided that my inner baker need something of an ego boost. While the urge to do something ambitious was rather strong, I resisted the temptation and decided to try something a little less complicated though still highly satisfying to make. Bar desserts you see, have always been a thorn in my side. Sure, I can make a batch of brownies and blondies, but they never come out totally perfect, perfect in the sense of appearance not flavor. There is just something that bothers me when the shape is warped; it should be square or rectangle, not a convex polygon! However, it seems that the baking gods were on my side Saturday night since I nailed the flavor and shape! My little square pie (which it technically is) was met with rave reviews. I think my close friend’s reaction was the best. It kind of looked like this.

Gus's reaction say's it all: pure dessert bliss

Gus’s reaction say’s it all: pure dessert bliss

Ego boost achieved!

Blueberry-Blackberry Pie Bars

Adapted from a recipe found here

Ingredients
For the crust and topping
1½ cups all-purpose flour
¾ cup sugar
Pinch of salt
Zest of half a lemon
¾ cup (12 tbsp.) unsalted butter, cold

For the filling
2 large eggs
1 cups sugar
½ cup sour cream
6 tbsp. all-purpose flour
Pinch of salt
Juice of half a lemonIMG_20130713_205517_20130718180318859
1 tsp. vanilla extract
1 Full package of Blackberries (6 ounces)
8 ounces Blueberries

Preheat the oven to 350˚ F.  Line a 9 x 9-inch baking pan with foil and grease lightly.  In the bowl of a food processor or electric mixer, combine the flour, sugar, salt and lemon zest.  Pulse briefly to blend.  Cut the butter into small cubes, then add to the bowl with the dry ingredients.  Process in short pulses to cut the butter into the dry ingredients until only small pieces of butter remain and the mixture is crumbly.

Reserve ¾ cup of the mixture for topping the bars.  Add the rest of the mixture to the prepared pan and press to form an even layer of crust on the bottom of the pan.  Bake 12-15 minutes, until light golden.  Let cool 10-15 minutes before proceeding.

In a medium bowl, make the filling mixture.  Combine the eggs, sugar, sour cream, flour, salt, lemon juice and vanilla.  Whisk until smooth. Gently stir in the blackberries with a spatula.  Spread the filling mixture over the pre-baked crust in the baking pan.  Crumble the reserved topping mixture over the filling evenly.

Bake until the top is beginning to brown and the bars are just set, about 45 minutes.  Let cool completely on a wire rack.  Chill to firm up before slicing and serving.

Recipe Write Up: Strawberry Rhubarb Crisp

Rhubarb is an interesting fruit. For someone like me, who until a few days ago had never even tried it before, the taste is one that can catch one off guard. It’s sweet, kind of. It’s also tart, but not too tart. When paired with strawberries, the two play off the others distinct flavor profiles, creating a new flavor that is just makes your mouth water. Throw in a buttery crumb topping and you have a summer dessert that anyone should be proud of.IMG_4188

This dessert is a milestone moment for me: it is my first time making a crisp! Needless to say, I as a bit worried about mucking the recipe up. While I wasn’t bracing myself for another food disaster (unlike a certain chocolate cake), I was a wee bit worried about preparing the rhubarb. As you will see below, the recipe asks for four cups of peeled rhubarb. Not totally sure about peeling rhubarb, I went to my go-to source, Baker’s Illustratedjust to verify that peeling was indeed the right way to go. Although BI insisted that peeling rhubarb was the correct thing to do, I wasn’t 100% convinced so I sought aid from the internet. Apparently, there is a big debate surrounding rhubarb. To peel or not to peel. Some sources say yes, others say don’t, that peeling rhubarb will remove some of the flavor. Slightly worried about what to do, I decided to go with the directions in my BI. The process was a bit tedious since I did have a quite a bit of rhubarb to go through and a cat that wouldn’t stop playing with the shavings but an hour later, the rhubarb prep was over!!!! Throw in my slices of strawberries and the two made quite the pair. IMG_4200

In the end, peeling seemed like the right choice. The flavor was still there though I am curious about trying it the other way next time. As for the family? They loved it, marking this as a new family favorite. Except for my older sister. She is allergic to strawberries. Ooops. Sorry D.IMG_4202

Strawberry Rhubarb Crisp

From The Back in The Day Bakery Cookbook (serves 8 to 10)

For the Topping:
1 cup of unbleached all-purpose flour
1/2 cup of packed light brown sugar
3/4 cup of old fashioned rolled oats
2 tablespoons yellow cornmeal
2 teaspoons of ground cinnamon
1/4 teaspoon fine sea salt
8 tablespoons (1 stick) cold unsalted butter, cut into 1/2 inch cubes
1 tablespoon of canola oil

For the Filling:
2 cups of strawberries
4 cups 1-inch pieces peeled rhubarb
1 1/4 cup turbinado sugar*
3 tablespoons of unbleached all-purpose flour
1 tablespoon cornstarch

*If you do not have turbinado sugar like I didn’t, you can substitute it with brown sugar. Don’t worry, the required amount stays the same.

Method:
Position a rack in the lower third of the oven and preheat the oven to 350 degrees. Butter a 9-inch deep-dish pie plate and line a baking sheet with parchment.

Topping: In a medium mixing bowl, stir together the flour, brown sugar, rolled oats, cornmeal, cinnamon, salt, butter, and oil with a fork hand mixer on low until completely blended. Set aside.

Filling: In another bowl, combine the strawberries and rhubarb with the turbinado sugar, flour, and cornstarch, stirring to coat the fruit.

Pour the fruit mixture into the prepared pie plate. Sprinkle the topping evenly over the fruit mixture. Place the pie plate on the prepared baking sheet. Bake for 40 to 45 minutes or until the fruit is bubbling around the edges and the top is golden brown and crispy. Let cool slightly.

Serve the crisp warm. It is best served the same day, but it can be covered with plastic wrap and refrigerated for up to 3 days.

Enjoy!!!!